Interesting documentary on an interesting Brazilian Designer
17/05/2011
12/05/2011
Taking the needles to the street
Welcome to Guerrilla Hemming- a quick and easy way to hem a pair of pants, skirt or whatever it may be- sewing machine is optional.

Determine the length you want to remove from your garment [ie: 7cm]
Subtract 2 cm from this number for the seam allowances and 1-2cm depending on how thick the fabric is that you are hemming [2cm for jeans, or cords 1cm for cottons, or linens]
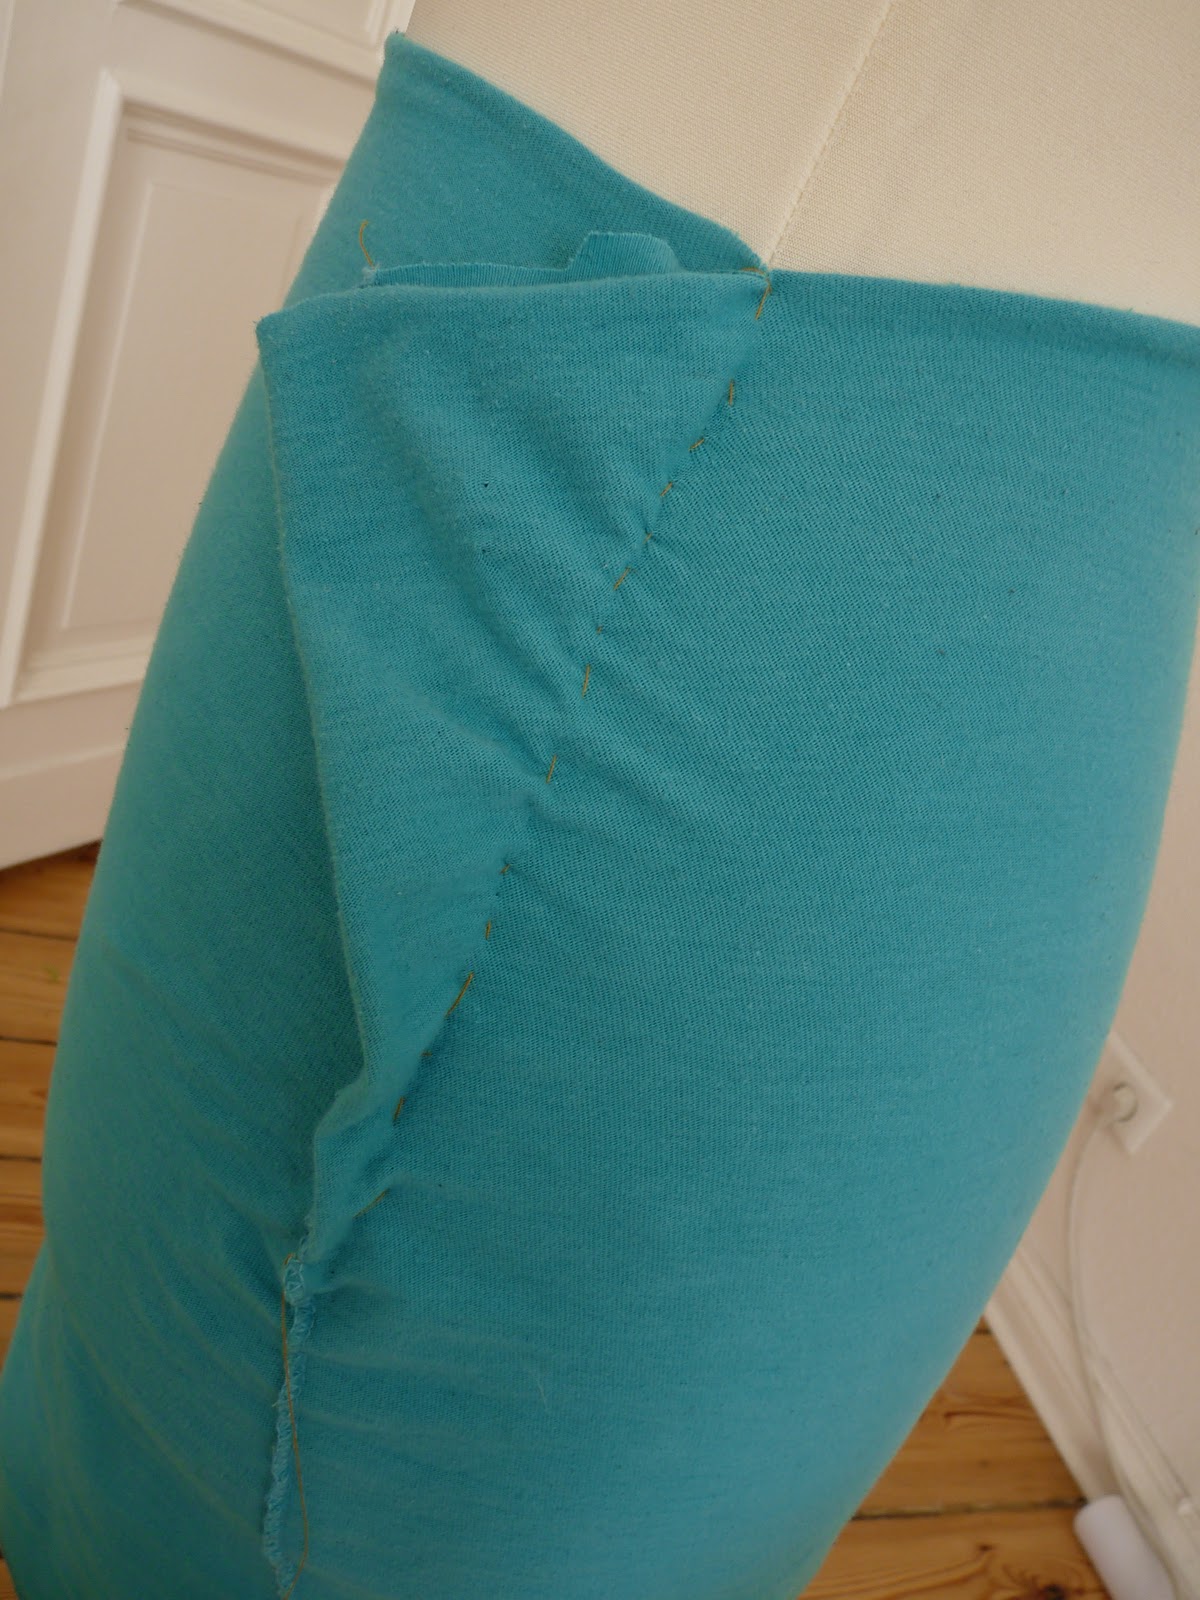
Turn the pants inside out and measure the desired length [in this case it is 3cm]

Step 2:
Iron down the "cuff" that you have created. Make sure the "cuff" is the same measurement all around the garment.

Now unfold and cut along the line created by the iron.

Step 4:
Sew the side seams of the garment (about 2cm up from edge) to reinforce the seam so it doesn’t unravel.
Step 5:
Turn the garment inside out and iron 1 cm all around, check for accuracy. Now fold the ironed seam in and iron once again.


Step 6:
 |
| .remove the extension table. |

Step 7:
Sew the underside of the garment using the seam edge and the guidline on the sewing plate.
Alternatively pin hem down and use a slipstitch (or any stitch you know how to do) to complete the hem.
Sew the underside of the garment using the seam edge and the guidline on the sewing plate.
Alternatively pin hem down and use a slipstitch (or any stitch you know how to do) to complete the hem.

Tie a knot with the long threads to secure the stitching.
And voila you have your first hem done.

Pin the piece of fabric that you removed from the other leg/sleeve that you have just sewn. Cut using it as a guideline.
Repeat steps 1 through 8
.
10/05/2011
8-Bit Fashion in Japan
Anrealage || Real . Unreal. Age
Kunihiko Morinaga's newest collection called Low was debut at Tokyo Fashion Week Fall/Winter 2011-12. A beautiful play on using cutting edge technology to create a low resolution 8-bit look.

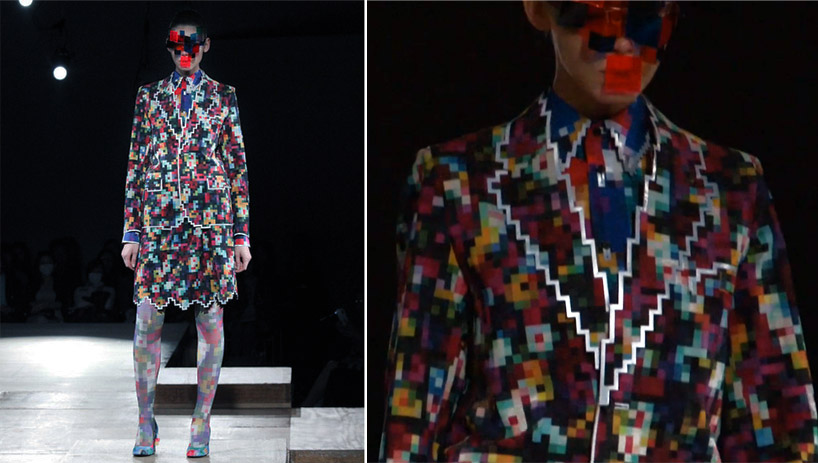
Check out the video of the fashion show on vimeo.
31/03/2011


25/03/2011
Mini Skirts Revisited
So here are some other ideas/pictures for converting shirts into mini skirts, the techniques are realtively the same as the T-Shirt mini skirt


24/03/2011
T-Shirt Mini Skirt


4 Easy Steps to making a mini skirt out of old t-shirts. Why throw away when you can re-use and re-create your wardrobe.
Materials:
- thread
- a machine that can do zig-zag stitches or a babylock machine
- a mannequin or model you can drap the fabric on
- pins
- needle and thread for basting


For the pattern
Why is it important to make a pattern? If you make a pattern than you are guaranteed to have straight side seams and a grainline that follows the weave every time. If the side seams aren't straight than you skirt won't fall straight.

- hip curve ruler
- square ruler / transparent ruler
- pencil and pencil crayon
- craft paper
- pins
- glue
Step 2: Using the rulers fix traced lines to best fit. Find the Centre of the pattern, square up from hem. Fold in half, pin and cut. This will be your template for the pattern
Step 3: Take a large enough piece of paper that will fit the skirt twice. Fold in half. Trace the skirt template. Find the centre and draw grainline and add necessary info (ie: front skirt). Pin the fold paper together, and cut out.
Step 4: The second pattern piece will be your back pattern. Mark 1cm in from side seams, and cut. Find centre and draw your grainline, mark necessary info.
The nice thing about jersey is that the edges roll and create an already finished look. However if you want something even cleaner you can make a facing (copy patterns 12.5cm from waistline) or cut 2 of each pattern to create a 2-ply skirt.
22/03/2011

Subscribe to:
Posts (Atom)